I got to be honest: it’s a heavenly recipe and therefore you should be patient like a Saint to make it… (it takes a bit a long time).
However, this is an ideal breakfast recipe for two main reasons:
1) It will tie you up for most of the day
2) The day after, it will seem to have breakfast at the bar while staying at home.
The recipe I used (and I also admit simplified / trivialized / adapted to my skills) is 100% French because the risk of not obtaining the desired puff pastry bites after six hours of work wasn’t acceptable!
MAKES 15 BRIOCHES
READY IN 5-6 h

INGREDIENTS:
0,7 oz fresh brewer’s yeast
5,2 oz water
3,7 oz milk,
17,5 oz flour,
2,2 oz sugar
1 egg
1 pinch of salt
1 teaspoon water (if necessary)
1,7 oz butter at room temperature
8,8 oz butter
Flour to taste
2 chocolate bars
1 beaten egg yolk
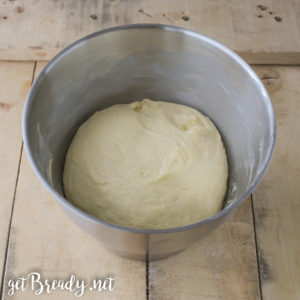
STEP 1: MAKE THE DOUGH
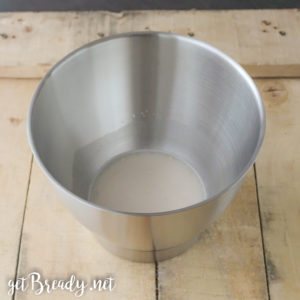
Dissolve the yeast into the water at room temperature, mixing with a fork.
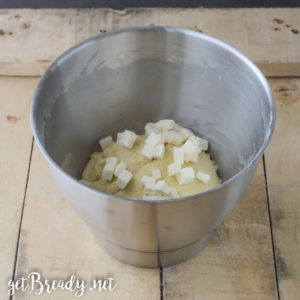
Operate the kneading machine (if you want you can also knead by hand) and add milk, flour, sugar, egg and finally salt to the dissolved yeast.
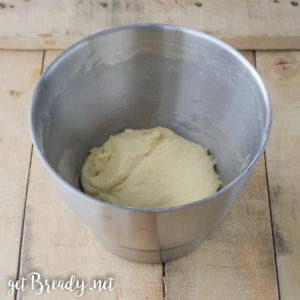
If necessary just add a teaspoon of water to get a ball, then add cubed butter (it will take about 10 minutes to mix it with the rest of the ingredients).
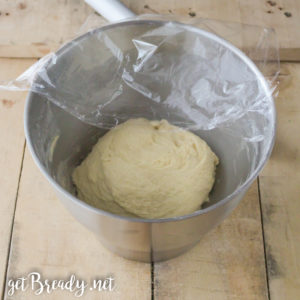
Finally, you’ll get a smooth ball: cover it with cling film (not in contact) and let it rise at room temperature for about 45 minutes.
STEP 2: MAKE THE BUTTER SHEET
Place the butter in the center of two sheets of parchment paper (one above and one below). With the help of a rolling pin roll it out to get a 20×20 cm square.

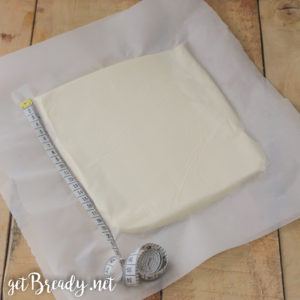
Place it in the refrigerator.
STEP 3: ROLL THE DOUGH OUT
Place the dough prepared on step 1 on a lightly floured surface (or parchment paper).
With the help of a rolling pin, roll out the dough into a 20x45cm rectangle (I measured it with the tailor’s tape to adjust myself!).
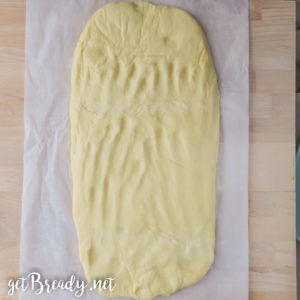
Now the sheet must cool in the refrigerator for an hour, so to store it I wrapped it in parchment paper and folded it in two.
STEP 4: 1st LEAVING
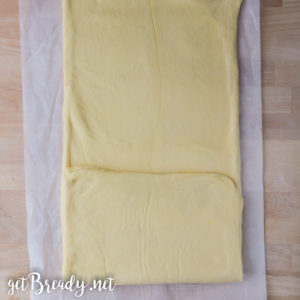
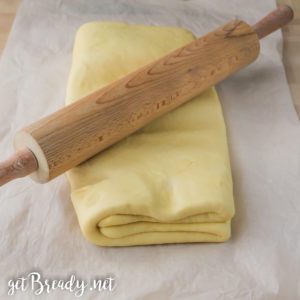
Place the rectangular dough on the pastry board and place the square of butter on it, in the center.
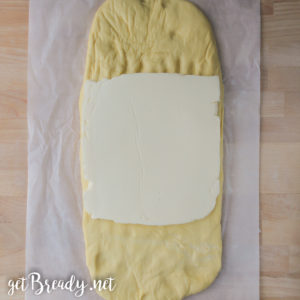
Now bring the lower part of the dough towards the center of the square
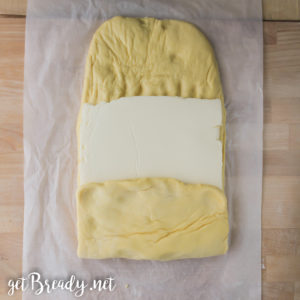
Do the same with the upper part.
This way you will have completely covered the butter square.
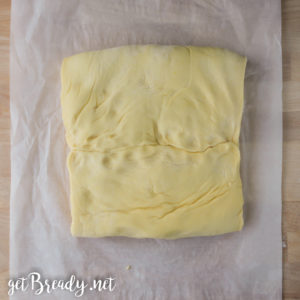
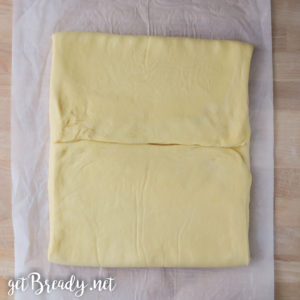
Now turn the dough a quarter turn (the seam should therefore be vertical).
Roll out the dough again with a rolling pin forming a long rectangle ab. 60x25cm.
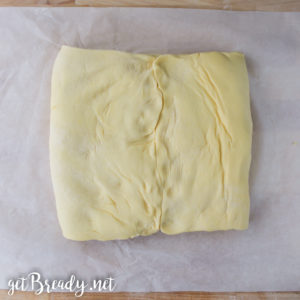
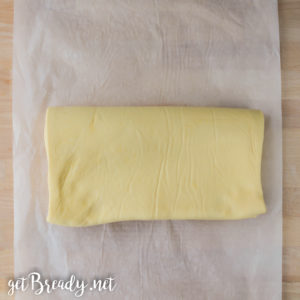
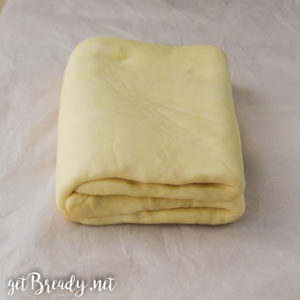
Now you should make a double fold:
imagine to divide the rectangle horizontally into three equal parts. Take the bottom part and bring it towards the center of the dough.
Now take the upper one and bring it to the center so that it touches with the one just moved.
Now fold the square created in half, so to obtain a rectangle made up of 4 layers.
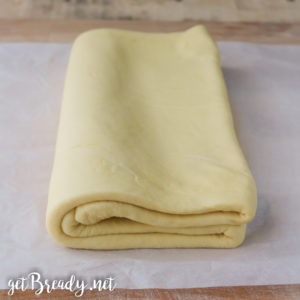
Wrap the rectangle in parchment paper and place it in the refrigerator for half an hour.
STEP 5: 2nd LEAVING
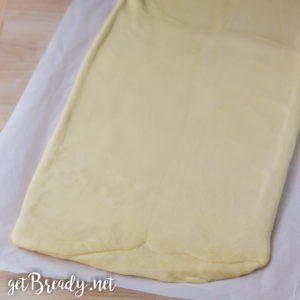
Place the dough on the pastry board lightly floured with the crease on the right side.
Using a rolling pin, roll out the dough to create a 60×25 cm rectangle again.
Proceed as in the previous step to make the double fold and let it rest in the refrigerator for another half hour.
STEP 6: SLICHE THE PAIN
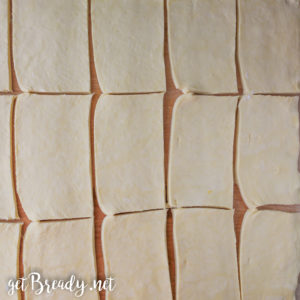
Remove the pasta from the refrigerator and roll it out in a 45×45 cm square.With a knife slice15 large rectangles about 9×15 cm.
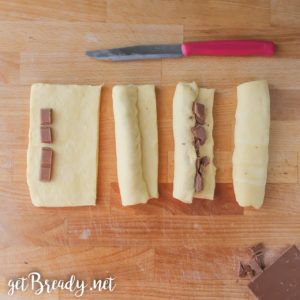
Now fill the rectangles by doing this:vertically place a strip of chocolate, start wrapping it halfway then place another strip of chocolate and close the dough on itself. Be careful to close the roll well (by pressing with fingers), making sure that the final seal ends below the roll.
STEP 7: LAST LEAVENING
Place the rolls in a pan lined with parchment paper resting them on the part of the closure (in this way they will not open during leaving). Brush them with beaten egg yolk and let rise at room temperature for 2 hours.


STEP 8: COOK
Bake the rolls in a preheated oven at 200 ° C for 20 minutes.


#getBready & enjoy your meal
Share on: